How to Get Back Messages on Android


If you're a photography lover, then it's not surprising that you may have over 25,000 photos housed in your iPhone. But holding such a myriad of pictures in the limited device storage could come with a problem. You'll run out of space instantly, especially when you live with a 16-gigabytes iPhone. One fairly simple resolution to this is to transfer photos from iPhone to your Windows 10 laptop. There're multiple ways to make it a breeze for keeping images stored locally, whether you're using a Windows 10 laptop coming from Dell, Acer, Asus, HP, Lenovo, or others.
Transfer Photos from iPhone to a Windows 10 Laptop
You can make use of Microsoft's built-in tools - Windows Photos app and File Explorer - to complete the photo transfer, which is still workable in a notebook without Internet service. An outstanding 3rd-party iOS-to-PC transfer utility can also do you a favor for importing photos from iPhone to Windows 10 laptop computer, no matter what the iPhone model is and which OS it's running - iOS 11, 12, 13, or newer. Don't want to leave behind the pictures uploaded to the iCloud Photos library? We've still got you covered!
To master all these details, you'll need to go through this article till end. If you undergo an issue that you can't browse or transfer images from an iPhone to Windows 10, jump to the last section to find the answer.
1. Import Photos to the Windows Photos app
Being secure, free and easy-to-use, Microsoft Photos App is your very first way to copy iPhone photos to Windows 10 laptop. You can transfer multiple photos all at once along with the facility of generating a preview before initiating the transfer process. It also makes you in command to select the desired storage path to save the photos or videos so that you can access them easily.
Now, all you need is a USB cable and the latest version of iTunes installed in your computer to move photos from iPhone to a laptop running Windows 10. Here's the complete procedure:

There's a select box in the upper left of the windows, where you can choose All items, Items since last import or None from its menu list.
See also: How to import photos and videos from an Android phone to PC.
2. Transfer iPhone Photos Using File Explorer
Like Photos app, File Explorer is also an official and free trick that you can employ for a quick photos transfer from iPhone to Windows 10 laptop. It'll detect your device as a digital drive, enabling you to save any photos on the machine as easy as copying and pasting. Plus, the Microsoft OneDrive is a nice addition, with which you can synchronize the images to the cloud directly with a great ease.
The time of the transfer process depends on how many pictures you intend to migrate. Here's how:
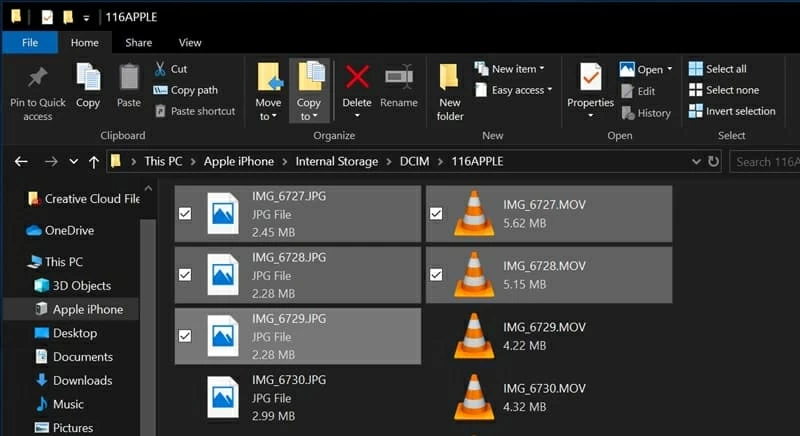
Here's a pro tip: If the computer keeps saying Device is unreachable while the device is connected and unlocked, go to Settings > Photos on the phone, scroll down and stop at the "TRANSFER TO MAC OR PC" section, and have the Keep Originals checked to fix up the issue.
3. Import iPhone Photos into Windows 10 Laptop via iTransfer
Claiming to be the ultimate data transfer software, iPhone Data Transfer is another way to go for the photo transfer. With it, you can comfortably transfer the data from iOS device to the PC or Mac computer, or vice versa. It grants you the full control with regards to photo selection. You can choose certain images, migrate over all photos from iPhone to a laptop running off Windows 10 version, or even save the whole photo folder(s) into the machine's hard drive via only clicking the "Export" button.
Moreover, if you're experiencing a phone switch, the "Phone to Phone Transfer" function that shipped right into the software could also save your efforts and get everything you need transferred between the devices automatically.
Precisely, we'll outline the instructions on importing iPhone photos into a Windows 10 laptop below.
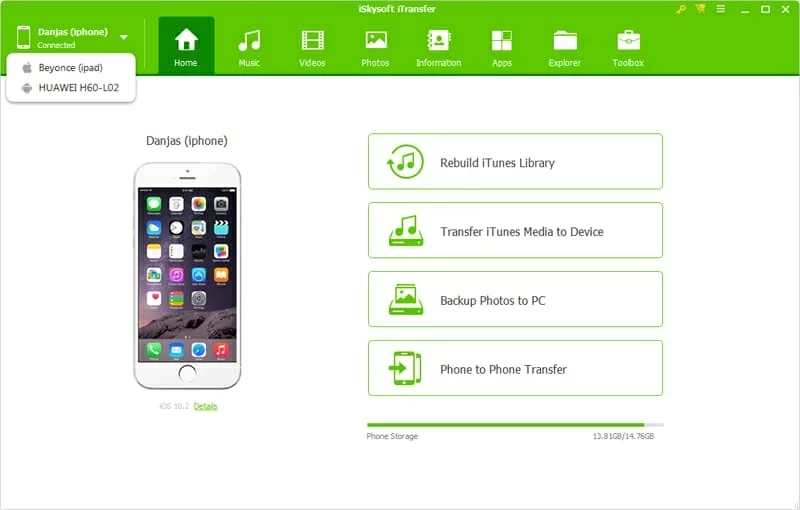
Step 1: Launch the software
Upon installation, run iTransfer and connect your iPhone to the machine via a standard USB cable. The software will detect your device automatically.
Step 2: Highlight photo(s) to transfer
When the main window of the application pops up, move the cursor to click on "Photos" tab. Within seconds, all the categories of photos that you have in your device will show up on the left, covering Camera Roll (it's checked by default), Photo Library, Screenshot, Live photos, and more.
You can have a preview of photo files covered in each section on the right of the screen, then select the image(s) that you need to migrate.

Step 3: Export photos from iPhone to Windows 10 laptop
If you need to add one or specific pictures into the laptop: Go to the upper menu line and choose Export > Export to PC and wait until it finishes.

If you need to put the iPhone photos in the folder into a laptop using Windows 10: Locate the folder's name on the sidebar, right-click on it and hit Export to PC in the dropdown menu.
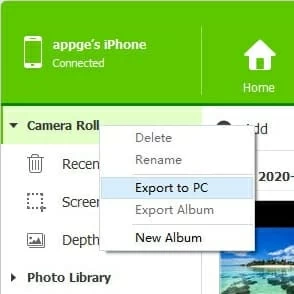
That's it!
4. Download iPhone Photos from iCloud
Now, it's the turn for those who prefer using iCloud Photos and want to archive or make copies of the images seated in the cloud to the computer.
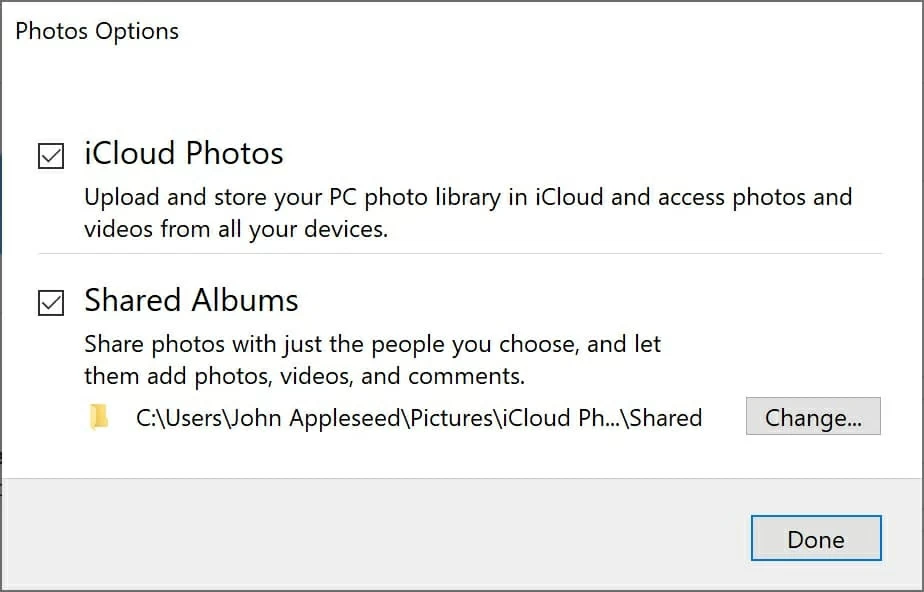
As the all the pictures in the iCloud storage can be easily accessible by logging into the same Apple account, you can sign in to the iCloud.com to download the pictures manually. Aside from this, one more effortless way that you can send images from an iPhone to a laptop running Windows 10 wirelessly is to apply the iCloud desktop application for Windows. Here's what you need to do:
Tips: Make sure that you've turned on the iCloud Photos option on your device first.
If you can't transfer photos from iPhone to Windows 10 laptop...
Follow the steps detailed clearly on this Apple Support Page if you've ever run into these problems: