Retrieving Gallery Pictures on Motorola Phone


I recently have picked up a new iMac to replace my broken PC and now I'm having issues in moving all my iPhone XR music to it. I found a couple of discussions on how to transfer music from iPhone XR to iMac but no luck. Any advice appreciated. Thanks.
On iMac, Apple is so nice to have iTunes (Apple Music app on macOS 10.15 Catalina or later) included right in the operating system to be a great first layer for your iPhone XR music management. You can feel free to apply it to transfer purchased music in iTunes Store or Music app to iMac within a few clicks. The sad thing is that, however, in order to prohibit piracy and respect copyrights, it places heavy restrictions on migrating non-purchased songs to iMac. Thankfully, this post is here down to the problem by clarifying a useful third-party software to transfer songs from iPhone XR over to iMac. Plus, the details of purchased music migration are also thoroughly included. Now go for checking them!
(Free) Sync iTunes purchased music: Music app (iTunes)
No need to panic if you find iTunes is dead on your iMac when you've updated to macOS 10.15 Catalina or later. The new Apple Music app is to manage music as what iTunes did, and you can get familiar with it quickly with basics of using iTunes.
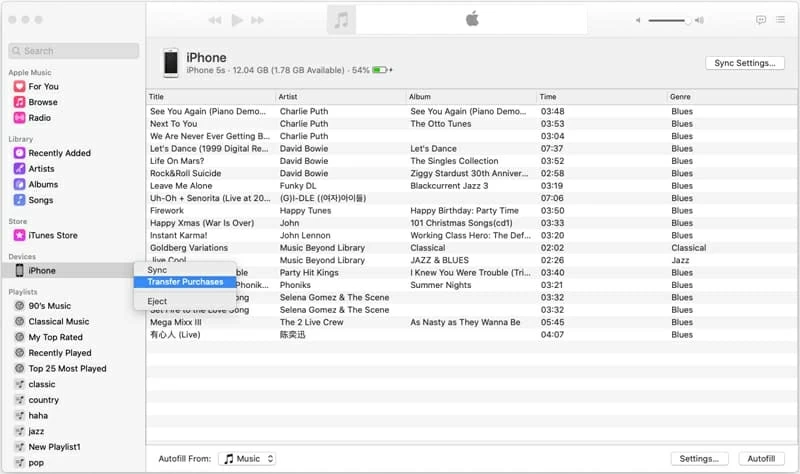
Through the function of "Transfer Purchases", it turns transferring purchased music from iPhone XR to iMac into a relatively fast procedure - connect iPhone XR to iMac, run Apple Music app, choose "Transfer Purchases", and then download the iTunes Store purchases locally.
To move purchased songs on iPhone XR to iMac, go this way:
Further reading: how to manually add music from macOS Catalina to iPhone.
However, there is often the case that you might save some tracks originally copied from CDs or other sources rather than purchase from iTunes store, and want to send them into iMac. To do that, a third-party transfer tool turns out to be a solid choice, for instance, iTransfer.
Speed non-purchased music transfer: iTransfer
iPhone Data Transfer, a fully functional iPhone music transfer tool, has everything you are looking for. It offers a sleek interface, a flexible function to efficiently migrate music from iPhone XR to iMac, or vice versa. You can transfer a bunch of tunes, playlists, or even entire music collection on the phone, with a preview of the detailed information like name, artist, genre, album, etc. The software also has the added bonus of being able to remove duplicate music files on your iPhone, and more.
In addition to music management service, there are also a host of other premium features to access. You could manage other media files like photos, videos, movies, TV shows, podcasts and some individual files such as contacts and call logs. Another cool thing about iTransfer is its one-click shortcuts, facilitating the process of backing up photos to computer and transferring data files from phone to phone in an efficient attempt.
Now let's take a closer look at the following quick instructions to get iPhone XR music transferred to iMac Pro effectively. The process doesn't require to compromise any files on your device.
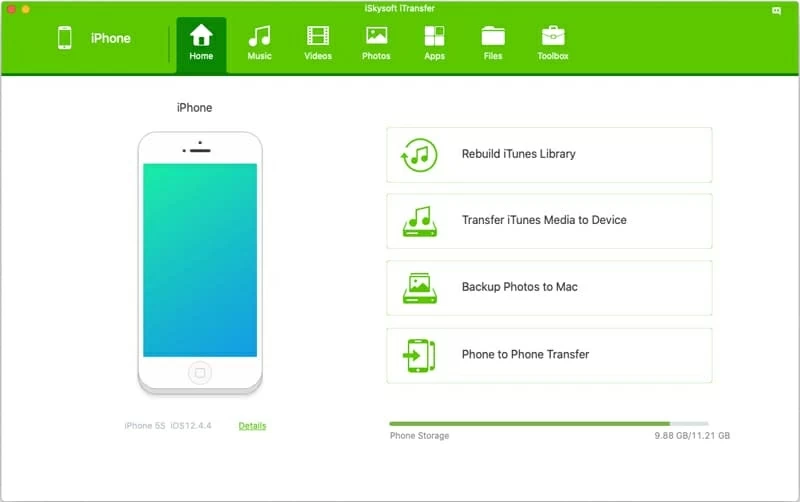
Step 1: Connect your iPhone XR to iMac (Pro)
First and foremost, download iTransfer on your iMac and install it.
Then launch it, and connect your iPhone XR to iMac via the original USB cable. Once detected, your device icon should appear on the window.
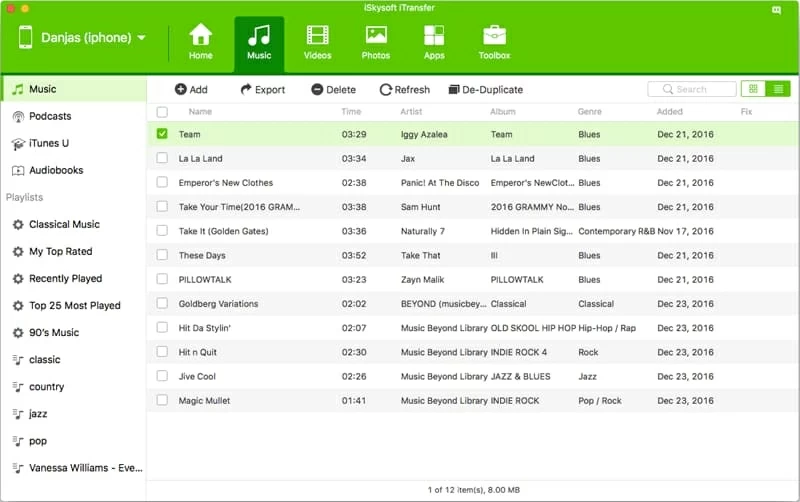
Step 2: Select music on iPhone XR to transfer over
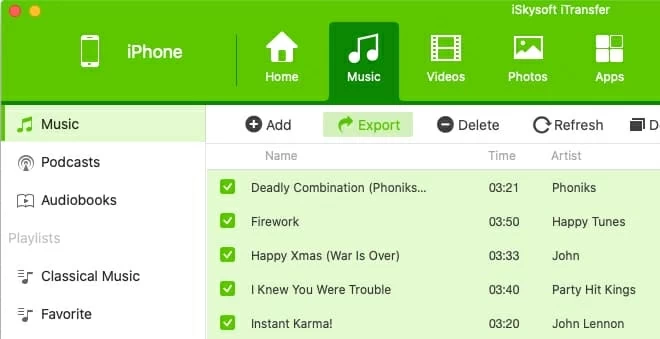
To create copies of music from iPhone XR on iMac, click Music from upper menu bar. All the music on your iPhone XR will display within seconds on the right of the screen.
Use the mouse to tick the checkbox to select the tune(s) you intend to save on iMac. Also, you can hit Command-A to select all the tracks to transfer.
Step 3: Begin to transfer music from iPhone XR back to iMac
Afterwards, choose Export and select output folder when asked. The tracks you just selected should save onto iMac.
The process could take several minutes, depending on how many songs are to be copied. Go and have a cup of coffee!
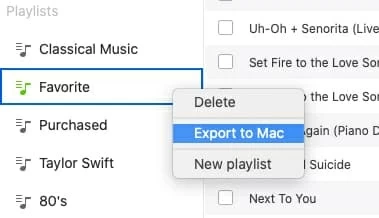
Optional: Put a playlist back on iPhone XR to iMac
Head to the "Playlists" part in the left panel, right-click on a playlist you want, and then hit Export to Mac.
Copy songs to iMac (Pro) with Apple Music subscription
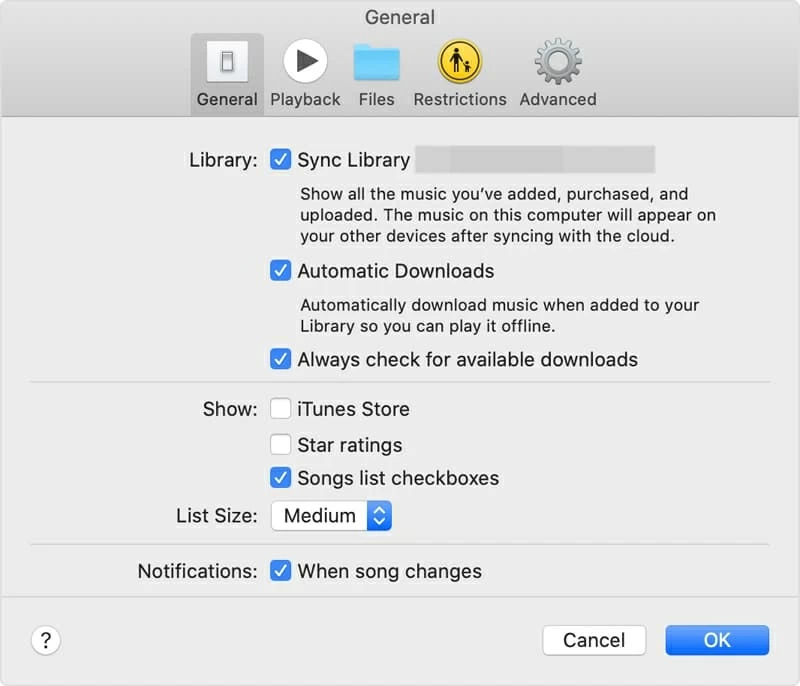
Not limited to iTunes purchased music, the new Music application on iMac also makes it a cinch to migrate songs downloaded from Apple Music app. If you're a subscriber of Apple Music and have enabled "Sync Library", you could get songs off iPhone XR and save onto iMac's hard drive without any hassle.