How to Recover lost Photos from iPhone X


Apple's iPhone is a great device for playing songs pursued by many users. Let's say that you've got a shiny new computer with Windows 10 preinstalled and you are trying to copy a ton of songs from your cluttered iPhone onto it, so that you can protect your music against unexpected data loss on iPhone, or simply reorganize your music library in a decent way on Windows 10 computer.
The iTunes, as is known to almost iPhone users, makes it pretty simple to put digital songs and files from Windows computer on iPhone — this is actually the one-way synchronization that iTunes can only perform, and thus saving your music files from iPhone and moving back to your Windows 10 can be even harder, with the exception of the tracks purchased through iTunes Store and stored on your iPhone.
In spite of the trouble, the efforts of software developers have taken all the pain out of copying iPhone songs to Windows 10 computer and now you can easily find a piece of software to get that done. Out of all the music transferring programs available online, iPhone Data Transfer could be the deserved one that fairly meets your need.
Being one of the best transfer tools on the market, it's about as powerful as it comes that making transferring music from iPhone onto Windows 10 desktop (or laptop) far quicker without a lot of sacrifice. You just connect your iPhone, select the tracks you need to transfer to your Windows 10 machine, and you're ready to go.
It also allows you to sync and export any kind of files such as contacts, text messages, playlists, podcast, videos, music to and from iOS devices, iTunes and computer, exempting the headache with the unlimited restrictions and limitation in iTunes.
If you've never employed iTransfer to import music tracks onto Window 10 laptop or desktop from your iPhone, follow this guide to see how simple it really is.
How to Back up iPhone Songs onto Windows 10
Step 1: Attach iPhone with Widnows 10
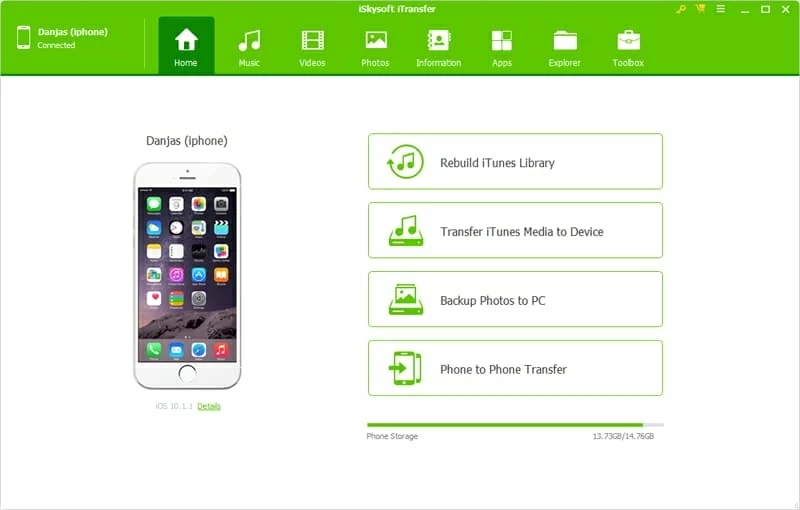
Grab your iPhone and connect it to Windows 10 computer. On running the application, you will see the sleek and stylish interface like the one displayed in screenshot below as well as the details of your iPhone.
Step 2: Highlight the music files to move over
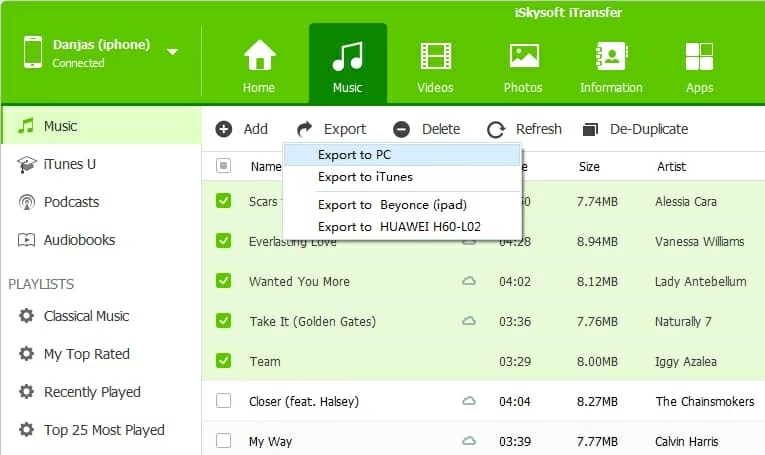
Head to the navigation bar at the top, click Music tab and the contents are classified into categories, showing on the left pane, like Music, Podcasts, iTunes, Audiobooks.
Then, click "Music" category from the left pane, you'll be presented with all music files of your iPhone on right pane, arranged by Name, Time, Size, Artist, Album and whatever.

Step 3: Copy Tracks from iPhone over to Windows 10 machine
Specify the tunes you wish to move onto Windows 10 from iPhone by placing checkmark in front of each song.
Next, click the Export button right beneath Music tab and this will bring up a drop-down menu. You then select Export to PC option from the list, and define a folder for the transferred songs to go into, click the Save button and the music transfer will begin immediately.
Depending on how many tracks need to be transferred , it may take some time to complete this stage.
Tip: If you just want to make a full copy of songs in a playlist to a Windows 10 computer. you can move your mouse cursor to a certain playlist under Playlists option on the left pane, then right click the playlist and choose Export to PC in the right-click menu to accomplish the task.

When the music transfer process has completed, check the directory you just designated on your Windows 10 computer to make sure all songs from your iPhone have been successfully moved. Now drag the songs to media player for streaming or just leave them alone.
[Also see: How to recover deleted contacts from iPhone]
Other Options to Copy music from iPhone over to Windows 10
Of course, iTransfer isn't your only option for getting music off your iPhone and move onto your Windows 10 machine and you can also use Winamp and iMazing that we'll cover below.
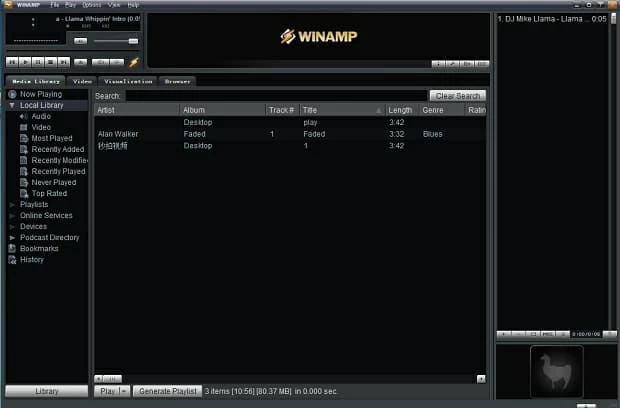
Option 1: Use Winamp
Winamp is actually a media player, and has the support for managing media library and syncing songs to computer's local hard drive. It's free but requires iTunes installed and mliPod plugin. Here's how to use it properly.
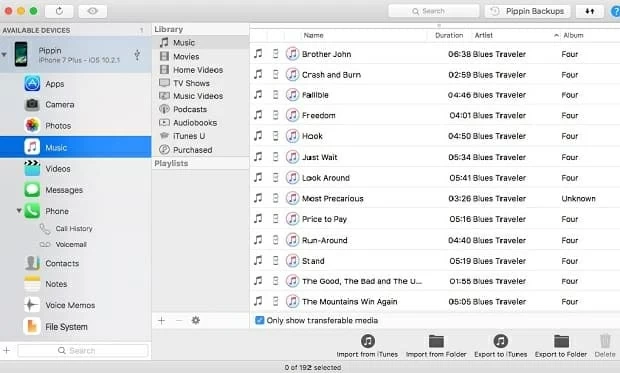
Option 2: iMazing
If you don't want to install the plugin as the Winamp required, you can have a try on iMazing which is ideal for bringing over your music files onto your Window 10 computer, but it's a bit limited for messages, call logs, contacts, notes and voicemail, as the program can only access from backup rather than your iPhone. Follow the guide below.
Conclusion
Either way you will save music library from being locked up on your iPhone and happily put it onto your Windows 10 computer. There's no shortage of iPhone tracks to Windows 10 migration software, and which one you use is largely up to your personal preference. Keeping iTransfer around could be your best bet for its support across platform and devices, running speed, flexibility and feature-packed functionalities.