Backing up Phone Numbers on an iPhone


So, you've got a dreaded "storage almost full" message on your iPhone XS device where a ton of songs are lying around. To free up space, one fairly simple way at your disposal is to migrate songs from iPhone XS to a Windows 7 computer (laptop & desktop). Surely, Apple's iTunes offers an avenue of syncing music on iPhone with your computer. However, it's a way one-way street, meaning that you can't put music back to the computer.
Well, don't let this to get you down, though. There're still plenty of methods being around you by which to transfer iPhone X/ XS (Max) songs to Windows 7 easily and efficiently. Also, a quick wizard on transferring iTunes purchased music will be outlined at the end of the article.
Employ a Do-It-All Data Transfer Tool
If it's a simple process you're looking for, a solid iPhone music transfer program should be your first choice when it comes to transferring music files from iPhone XS to Windows 7 computer. iPhone Data Transfer is such an app that really shines for its effectiveness and efficiency. Once it's installed, connect your iPhone to computer, choose songs or playlists you'd like to copy over, and click Export to PC button. The software should handle the rest pretty quickly.
It is an exceptionally functional program. The overall UI feels a lot light and modern, resulting in an excellent software experience on moving tracks on iPhone X to Windows 7 PC. And it's up to you to choose whether some pieces of tracks, all of music files or the specific playlists to transfer. Moreover, it includes the ability to take control of other data on your phone, like photos, videos, messages, contacts, audiobooks, and more, and let you transfer them from your iPhone to the computer or vice-versa effortlessly.
Now, you only need to take a few mouse clicks to get songs off iPhone XS (Max) and save onto Windows 7 PC. To begin with, get the software downloaded and install it. Then go through the easy instructions below.
Step 1: Plug the iPhone XS into Windows 7 computer
Launch the software on your Windows 7 machine, and then attach the iPhone XS device to the machine using a Lightning to USB cable.
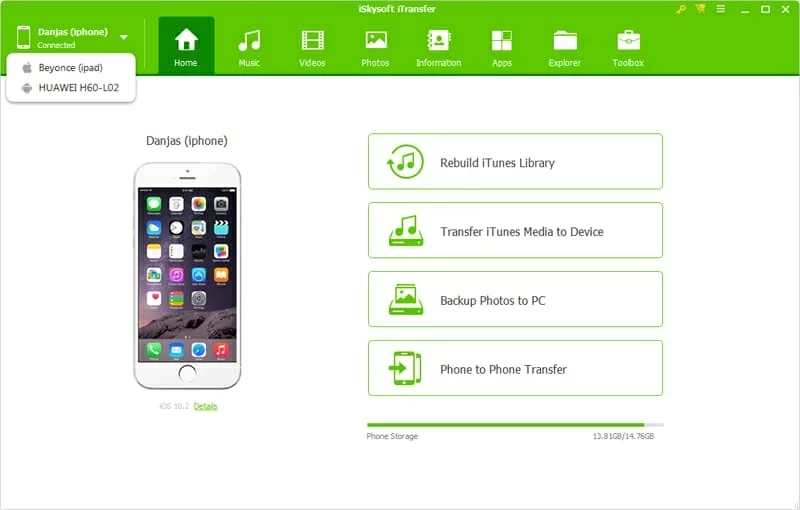
Step 2: Choose the song(s) on iPhone XS to migrate into Windows 7
Once the iPhone X/ XS (Max) recognized, hover the mouse cursor over the Music tab on the top bar and click it. This will show your iPhone XS music library, categorized by music, iTunes U, postcards, audiobooks and playlists on the sidebar.
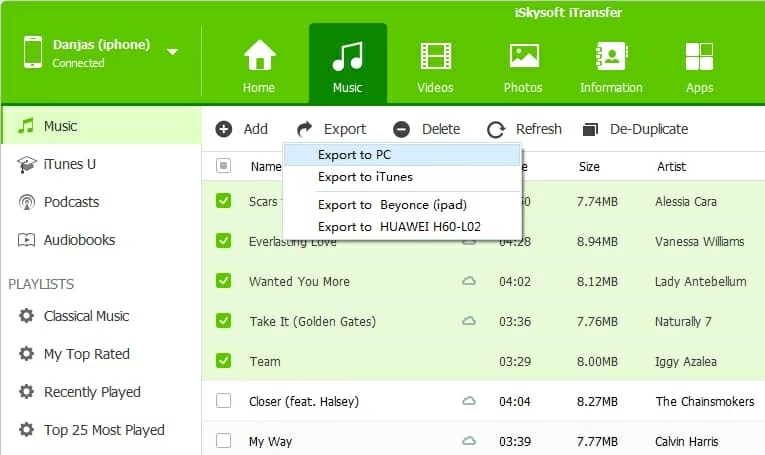
Use the checkboxes to easily select the music track(s) that you want to copy onto Windows 7 machine. If you wish to migrate all tunes, check the tiny box beside the "Name".

Step 3: Moving music from iPhone XS to Windows 7
When you're all set, click Export option located under the Music tab, then choose Export to PC in the drop-down menu. This should automatically bring up a dialog box where you need to select an output folder to save the transferred iPhone XS music files.
Hit Save button to confirm and the software initiates music transfer from iPhone XS Max to Windows 7.
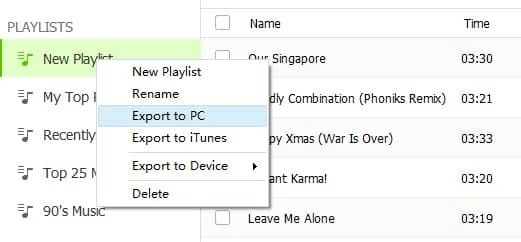
Tips: Adding a playlist on iPhone X to Windows 7 desktop & laptop is as easily as transferring individual songs. You just go to the "PLAYLISTS" section on the sidebar, right click on the playlist you need, and press Export to PC from the pull-down menu.
Succeed! Your songs and playlists on iPhone X/ XS (Max) are imported to Windows 7 PC.
Adopt iTunes to Transfer iTunes Purchases (Free)
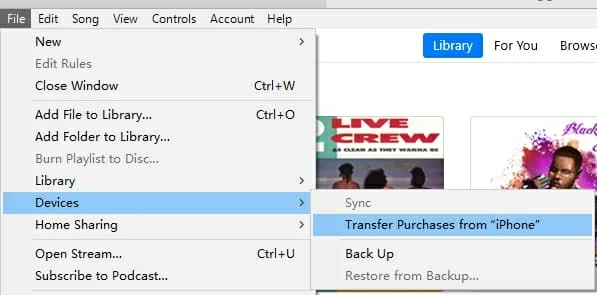
Despite the restriction of the one-way music transfer via iTunes, Apple has left a back door opening to the music that was purchased from iTunes Store or downloaded from Apple Music. The nice "Transfer Purchases" feature empowers users to transfer purchases into the authorized computer. With this in mind, let's begin using iTunes to copy iPhone XS music back to Windows 7 laptop & desktop for free:
Once done, check out the music through Music\iTunes\iTunes Media. You can now play the songs with the media players.