Get iPad Music onto a PC Instantly


Imagine that one day, you attempt to save a new pleasant jazz music on your iPhone 8 device as usual, but you fail, only being prompting that storage space is running out. If that is the case with you, you're not alone. It is common for a music-obsessed person to fill up his smartphone quickly with a great deal of songs, whether the device comes with 64GB, 128GB or even 256 GB of storage. Instead of deleting your favorite songs on iPhone 8, you'd better copy them to a Windows 7 computer.
Here, this post will be devoted to going over two feasible options to get music off iPhone 8 (Plus) and transfer to Windows 7 laptop & desktop. Whether the songs you bought in the iTunes Store, or you've kept the tracks ripped from CDs or somewhere, we've got you covered.
Option 1: Transfer purchased music via iTunes
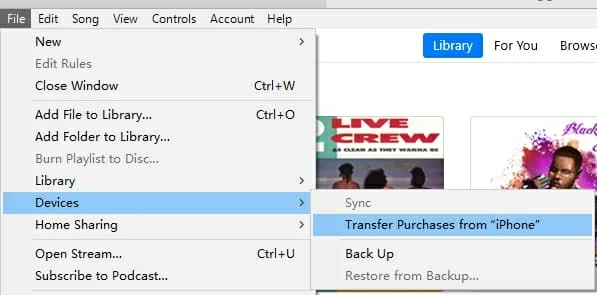
Though iTunes makes syncing iDevice with a computer relatively straightforward, it's not that easy when you need to tranfser music from iPhone back to the computer—except those iTunes purchased songs. To import iPhone 8 purchased music onto Windows 7, you just launch iTunes, connect your phone to computer, click "Transfer Purchases" option and you're good to go. Below is a quick wizard:
With all desired songs downloaded, check them by going to: Music\iTunes\iTunes Media on your Windows 7 computer.
Tips: As we know, Apple devotes to the copyright protection of digital music. So if you're going to migrate the non-purchased music on iPhone 8 to Windows 7 PC, like the songs you got from ripped CDs, Internet or other sources, skip down to the next option.
[Read Also: How to Import Tracks from Windows PC to iPhone without iTunes]
Option 2: Migrate non-purchased music
There're several reasons why you might need to save songs from iPhone 8 back to the Windows 7 computer—maybe you want to make copies of the iPhone music on PC or perhaps you just want to add to the computer for offline listening. Whatever it is, the solution is always go with iPhone Data Transfer. It offers an effective way of transferring music files from virtually any source, whether they're years of songs ripped from CDs, or downloaded from an online source.
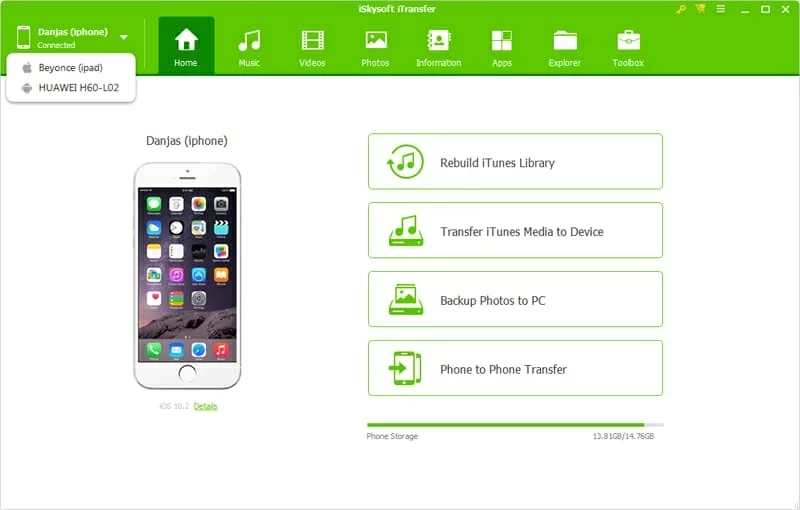
This program enables one-stop solution, along with appreciated functions. When you launch the application, connect iPhone 8 to the Windows 7, it will scan your device for media files. And once the songs are identified, iTransfer's organization feature shines: you can browse the music tracks by their name, artist, album, size, time, date added and so on.
It also comes with some awesome features for managing files: rebuild iTunes library, back up photos to PC, and even grants users to transfer files from one phone to another.
You can download the software via the Green download button above. Once you've got it installed, here's how to move music from iPhone 8 (Plus) onto Windows 7 computer for local playback.
Step 1: Attach your iPhone 8 to the Windows 7 computer
Launch the program on the Windows 7 PC, and then plug the iPhone 8 device to it using the included USB cable.
Step 2: Select iPhone 8 tracks to migrate
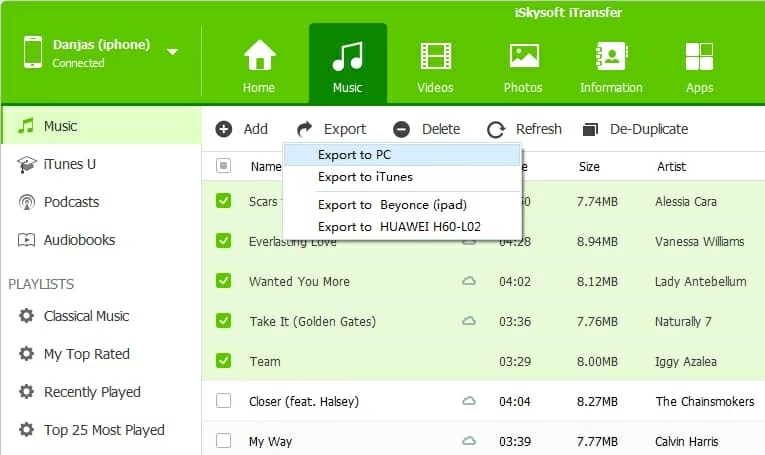
To import songs from iPhone 8 to Windows 7, click Music on the top navigation bar to continue. Be default, you're presented with a list of tracks of iPhone 8 (Plus), along with the detailed information including name, time, size, artist, album and more.
Next up, select the song(s) you desire to get onto Windows 7 desktop & laptop; Or you can also check the box next to "Name" header to highlight all tunes.

Step 3: Getting music off iPhone 8 and onto Windows 7 PC
Afterwards, click Export on the top menu bar and choose Export to PC from pull-down menu.
When a dialog box opens, choose a folder where you want the transferred music saved to, and then click Save button. The program will make the transfer and put music from iPhone 8 Plus onto Windows 7.
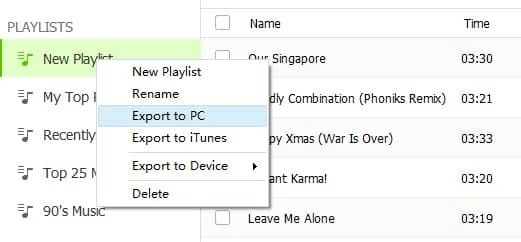
Extra steps: Copy playlist (s) on iPhone 8 back to Windows 7 laptop & desktop
On the left pane of the program window, preview and choose a playlist you're interested in, right-click on it, and select Export to PC option from the pop-up menu.
There you have it. Enjoy!