MOV Converter- Convert Videos to and from MOV on Mac OS


We all love music! Whether you're at home or on the go, listening to the digital music with your iPhone or iPad is a nice thing. Of course, we aren't content with playing just the odd album or handful of singles all the time. While you can download free tunes online, or get hot albums from Music services like iTunes Store and Spotify, it is likely that you'll have songs on your iPhone that you'd like to be able to listen to on the iPad. In this article we will look at how to move music from iPhone to iPad, so that you can enjoy tunes without limitation.
Although Apple iTunes is the official method for managing media files between your iOS devices and Mac, its synchronization feature doesn't allow you to backup your iPhone music onto computer and then sync with your iPad and vice versa, nor can Apple's iCloud service upload your tracks from an iOS device and re-download, over the air, to another. Both iTunes and iCloud only sync music you've solely purchased via iTunes between iPhone and iPad, all other music files that you've got or ripped elsewhere won't be synced.
So what does this mean, then? That you can only move iTunes-purchased tracks between your iPad and iPhone? Absolutely not. We'll show you how to transfer your iPhone songs to an iPad and vice versa with a tool called iPhone Data Transfer introduced in this article.
iTransfer does exactly as it promises quickly and efficiently. It enables you not only to move all kinds of files including music from iPhone to iPad and vice versa, but also can manage and transfer content amongst iOS, iTunes and Mac/ PC's, as long as you use a computer as a go-between. Better still, it boasts a handful of help features to manage your device such the ability to delete, create, add, de-duplicate music tracks; create a new playlist, move songs from one playlist to another, etc.
iPhone Music to iPad Transfer
Step 1: Plug your both iPad and iPhone into your computer
Open iTransfer and connect your both iPhone and iPad using the USB cable that come with the device.
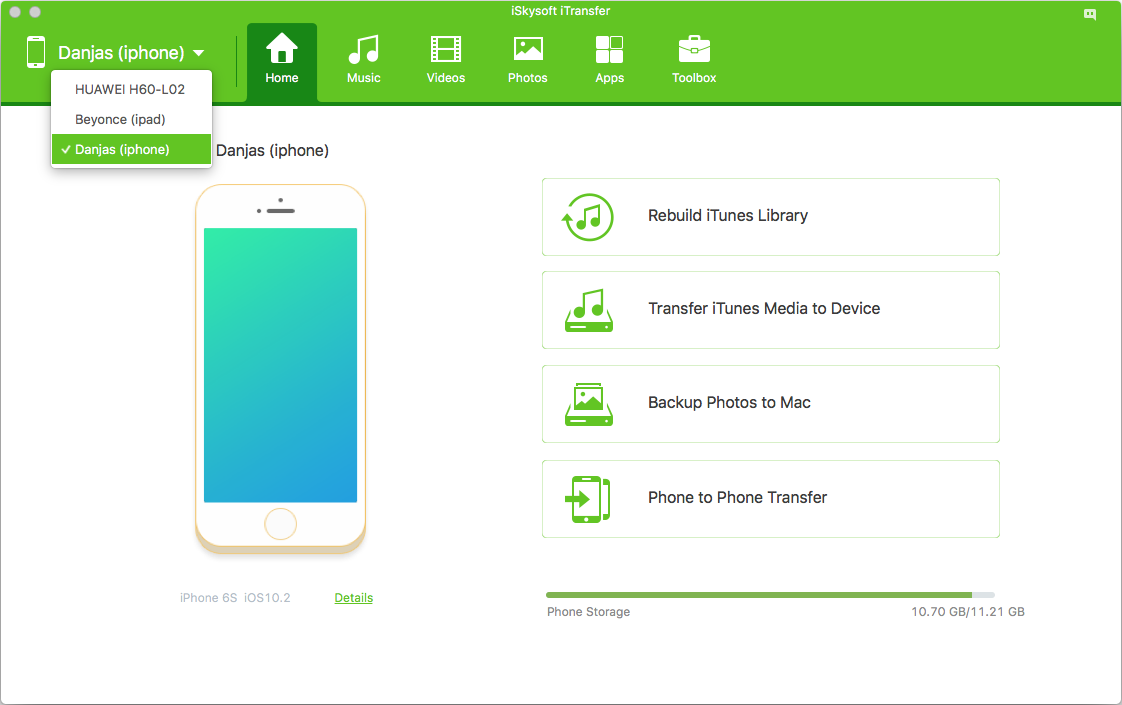
Once you've launched the program, you should get a clean and simple interface where you can see six navigation buttons located on the top bar for you to find the right area on your device to work on, as well as four quick access (shortcuts) of transferring content on the main area of the program window.
Then from the upper left corner of the interface choose one as source device. If you want to transfer music from an iPhone to an iPad, for example, here you pick iPhone as sender's device, or in the opposite direction, select iPad from the list.
Step 2: Select music files from your iPhone (or iPad)
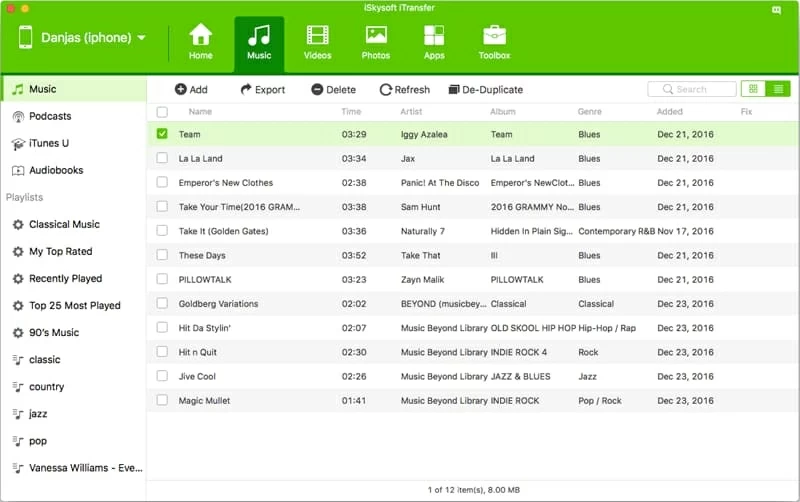
To get into music library on your iPhone click on the Music button on the top bar, the program will open a window where loads a summary of your device's tunes, as screenshot demonstrated below.
The program allows you to view your tracks in categories, which located on the left sidebar, including Music, Podcasts, iTunes U, Audiobooks and Playlists. It also supports filters display in track list like Name, Time, Artist, Album, Genre, etc.
Once your music library has loaded, locate the songs that you would want to transfer from iPhone to iPad. You can check boxes next to each track to pick individual ones, or check the box next to Name filter (under Add button on the top row) to select all of music files. Notice here on the very bottom of the window it shows you how many songs are selected, along with the total size.
One extra benefit of the software is it has a quick scan feature for missing tags, missing album, missing tracks and duplicate tracks (see De-duplicate button on the top row). One your device itself, you can also transfer music from one playlist to another via Add to option in right-click context menu.

Step 3: Export music on iPhone to the iPad
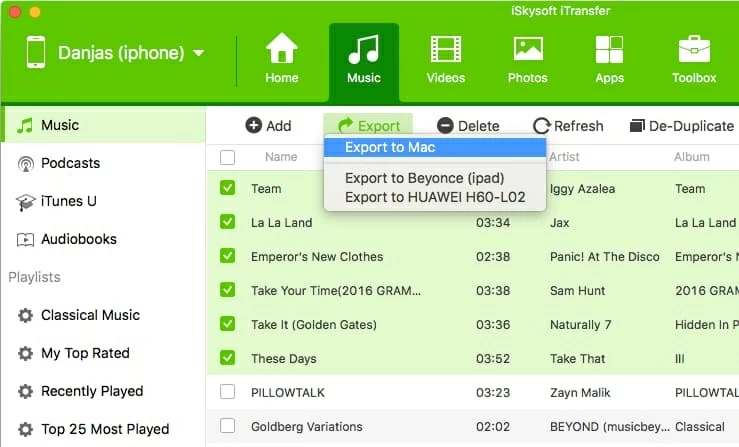
Lastly, it's just a matter of clicking the Export button such as in the following screenshot, from its drop-down list, select Export to [your iPad name] option.
Wait while the utility copies your selected music tracks from iPhone to your iPad music library.
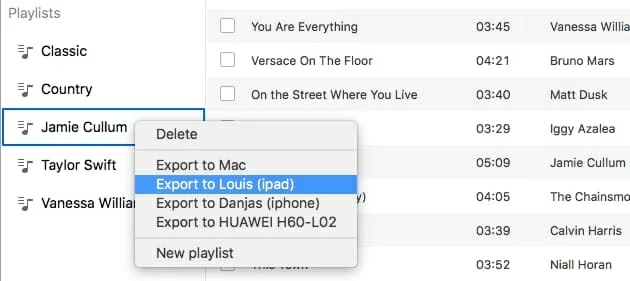
Note that if you just want to move a specific playlist of iPhone songs to your iPad, you can also hover the mouse over that playlist on the sidebar and use the right-click menu to handle the task.
Done!
iTransfer isn't only about music migration between iPhone and iPad, though. It also gives you ability to quickly export your selected music from iPhone to save on your Mac or PC computer, whether it is for safe backup, organized in your media library or sharing with friends later. It also carries a bunch of options to manage and transfer your photos, videos, TV shows, audiobooks, apps, contacts (Windows version) between your iOS, iTunes, and computer.
iPhone Models Supported: iPhone 7/Plus (2016/ iOS 10.10), iPhone SE (2016/ 10.10), iPhone 6s/Plus, iPhone 6/Plus, iPhone 5c/5s, iPhone 5, etc.
iPad Models supported: iPad Air 2, iPad Air 1, iPad (4th generation), iPad (3th generation), iPad 2, iPad 1; iPad Mini 4, iPad Mini 3, iPad Mini 2, iPad Mini (1st generation), etc.
How Do I Sync My iPad Data to a New Computer
How Can You Copy Text Messages from an iPhone to a Google Pixel Phone