Back Up my iPhone Music Library onto Laptop


I have a ton of music on my iPhone and I'd like to copy them to my computer. I used iTunes to do this, but all my songs wouldn't be automatically transferred to the computer. Anyone has ideas to this and how do I get that done?
Smartphones and tablets are the particularly portable devices for communication and entertainment. We take good advantage of various functions on the device, from chatting via calls and messages to surfing the Internet, shopping online, watching movies, listening to music and so much more. With the data files amassed in your iPhone over time, the device will end up in slower performance and thus you may tend to back up music files from iPhone to your computer to improve the device storage.
If you heavily rely on Apple's iTunes to manage your iPhone, you should know that how easy it is to import songs to iPhone, but it also turns out that transferring music from iPhone back to computer, whether it's a PC or Mac, is not the way iTunes can handle, because Apple strongly combat piracy and protect the music labels in iTunes Stores.
Nonetheless, there are great chances that you could save iPhone songs onto computer with the help of a piece of third-party software, so that you can easily add it to iTunes library or play on media player. We've tried many iPhone music to computer transfer tools before, but we found that iPhone Data Transfer works particularly fine and stands out with its simple and elegant features.
As an efficient and comprehensive data manager, it serves its purpose as a way to copy media files as well as personal files to and from iPhone. It is available for both Windows and Mac OS and fully supports all iOS devices.
It does much more than data migration between your device and computer. It enables users to rebuild iTunes library in one click, transfer iTunes media to device, manage the contents as well as automatically convert incompatible songs or videos into the format that the target device supports.
Download iTransfer and install it on your machine if you haven't already. And then follow the guide to transfer your tracks from iPhone to back up onto computer. [Read Also: iPhone contacts recovery with backup]
In-depth Guide
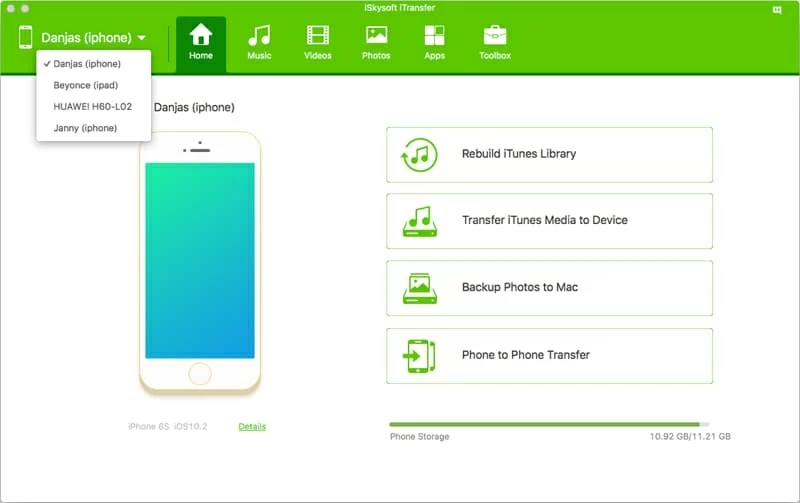
Step 1: Connect your iPhone to computer
Start up iTransfer and plug your iPhone into computer using a compatible USB cable. If iTunes automatically opens, you need to close it.
Now you will see the details and image regarding to your connected iPhone on the home window.
Step 2: Navigate and browse iPhone music files
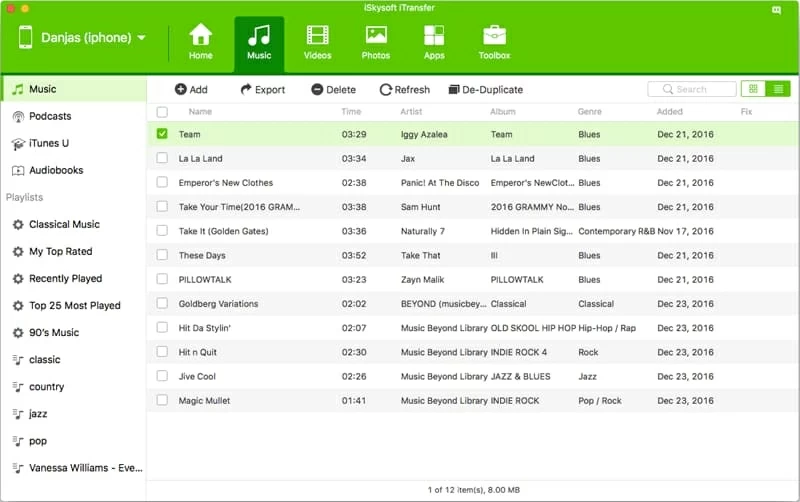
On the navigation menu beside your iPhone's name, click Music tab to enter the music page, where you see all your tracks on iPhone are sorted into categories on the left sidebar.
Click on Music category from the sidebar, and the program will return you an overview of all of your iPhone tracks on the right pane, organized with headers for name, time, artist, album and so on.
Step 3: Select the songs and begin copying from iPhone to computer
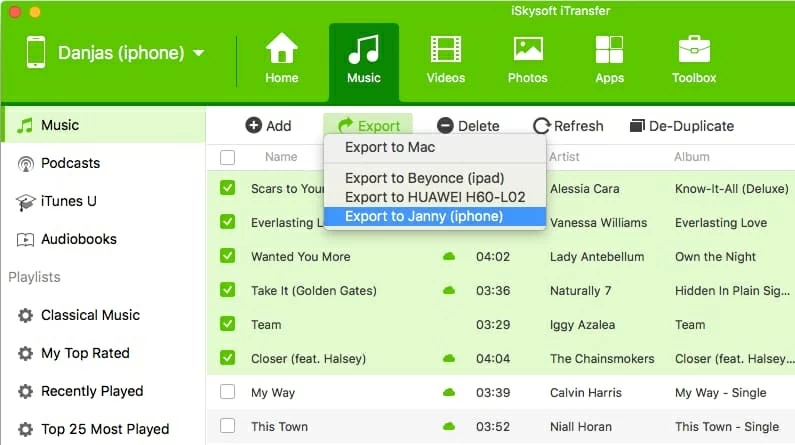
Then, you select which songs you want on the right pane and commence the transfer. To do this, check on each tracks and when selected, the white background will turn green.
After that, click Export button on the toolbar (under Music), then choose Export to Mac (or Export to PC on Windows platform) option from its pull-down menu and choose the location you want the copied music files from iPhone to store when a dialog box prompts.
When you are done, hit the Save button in the dialog and the program will go about its business immediately — it will transfer your selected songs that are on the iPhone to your machine.
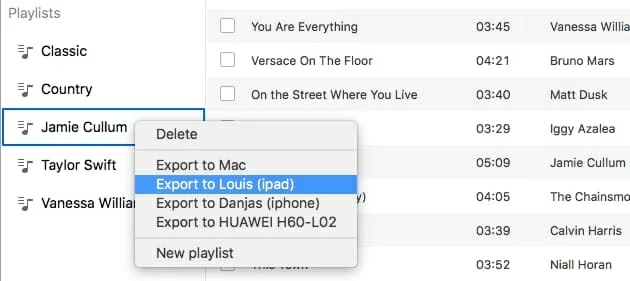
If you'd like to get complete playlist from iPhone onto computer, you can do so as well. Head to Playlist section on the left sidebar, right click on a playlist and select Export to Mac option. Repeat this step if you have multiple playlists and wish to export to computer.
Wait for the utility to finish moving tracks over from iPhone to your computer. When it's done, your newly transferred songs will be right in the folder you just defined. Enjoy!
For those who holds the tunes on iPhone that were bought from iTunes Store, you can get them totally onto computer in a direct way with iTunes. This is what you do:
Other Options to Save Music to Computer from iPhone
As I mentioned above that we've tested various of transferring applications before for importing all songs to computer from iPhone, here'll also list two of them for your references. Both are desktop programs and nothing needs to be downloaded on iPhone.
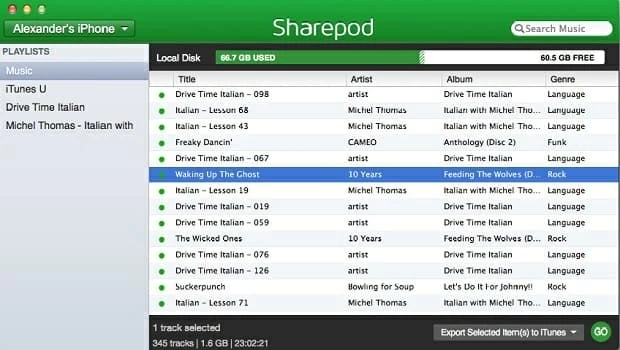
Option 1: SharePod
SharePod is a lightweight music management utility for getting music collection from iPhone to a PC or Mac computer. However, the program requires to install Apple's QuickTime during setup process, so that it functions properly.
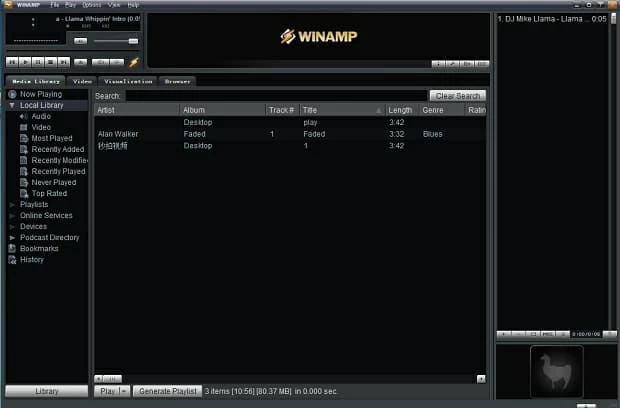
Option 2: Winamp + mliPod Plugin
Another method that is covered in this post is the free Winamp together with mliPod plugin, which enables music to be copied from iPhone to computer. Although it's boasted as a one-stop-shop music managing assistant, it's actually a bit complex for beginners to get the job done.
Follow these steps to copy songs from iPhone onto computer:
This way you are able to keep your music on iPhone stored in computer for free.
Conclusion
Overall, it's unnecessarily difficult to transfer iPhone songs to a computer with a right third-party program. Given how versatile yet simple it is and how well it operates, iTransfer is a must-have that you may feel like sticking with it to get music collections off of an iPhone and save onto a computer.
Supported iPhone Models: iPhone 5, iPhone 5c, iPhone SE, iPhone 6 (Plus), iPhone 6s (Plus), iPhone 7 (Plus), iPhone 8 (Plus), iPhone X, etc.
Export the Songs from iPod and Copy onto Android