
Get Back Deleted Photos on OnePlus


With the development of digital music on smartphone for decades, you've come a long way in enjoying music with your iPhone 7 device, resulting in a significant number of songs residing in the phone. Soon after, your phone is being full to the brim. To fix it without losing any beloved songs, it doesn't get much better than this - transferring music from iPhone 7 (Plus) over to your Windows 7 computer. The good news is that there are tons of apps out there focusing on the work of music transfer between devices.
However, most of the programs seem tricky and involve multiple operations when in the process of saving iPhone 7 (Plus) music back onto Windows 7 PC. Thankfully, there's no need to go through the hassle, and we'll show you how iTunes handles purchased music, and how you can move non-purchased quickly and easily.
Import purchased music - iTunes (Free)
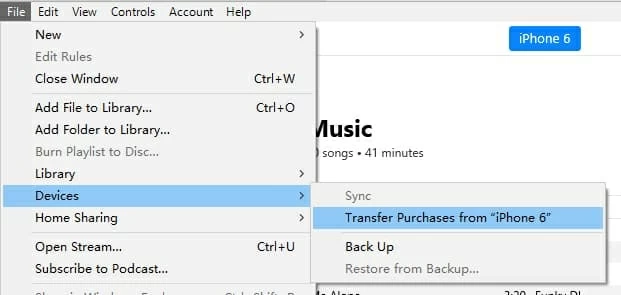
Apple's iTunes lets iPhone users do a lot with the music, one of which is to transfer the iTunes purchased music on iPhone to the authorized computer. If you ever downloaded and bought songs from iTunes Store and want to transfer them right onto the Windows 7 desktop & laptop, simply use the "Transfer Purchases" function within iTunes.
Make sure that iTunes has been updated to the latest version. Then here's what you need to do next in order to sync music from iPhone 7 (Plus) to Windows 7:
Although you should obviously get a better experience in iTunes for those paid music tracks, you will still need a third-party service to help migrating songs on iPhone 7 Plus that are recorded or ripped from CDs, or downloaded online. We love iPhone Data Transfer which offers a decent file transferring solution for the purpose.
Copy non-purchased tracks - iTransfer
With the robust iTransfer, moving music from iPhone 7 onto Window 7 machine, or vice versa can be done quickly and securely without losing data. It comes with a bunch of great features that a file-sharing application should have. You can transfer photos, videos, contacts, messages, TV shows and more media files amongst iOS device, computers and iTunes library.
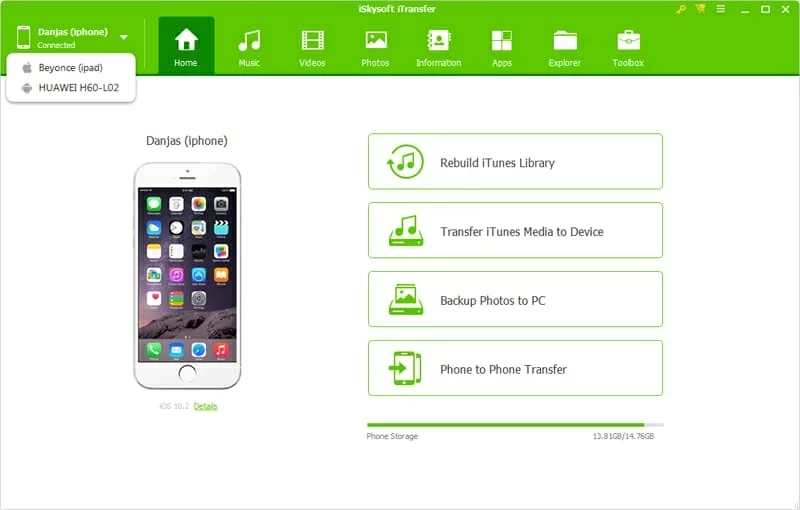
The default look is intuitive and functional, with four shortcuts on the startup window by which to accomplish different tasks effortlessly: Rebuild iTunes Library, Transfer iTunes Media to Device, Phone to Phone Transfer, Backup Photos to PC.
Process: Getting music off iPhone 7 onto Windows 7 computer
When you're ready to transfer iPhone 7 tunes to Windows 7 laptop & desktop, download iTransfer and install it properly. It's easy to set up without any ads or malware bundled.
Step 1: Hook up iPhone 7 to Windows 7 computer
Fire up the software on the Windows 7 desktop & laptop, and then connect your iPhone 7 device to it with USB cable.
Step 2: Select the songs to transfer
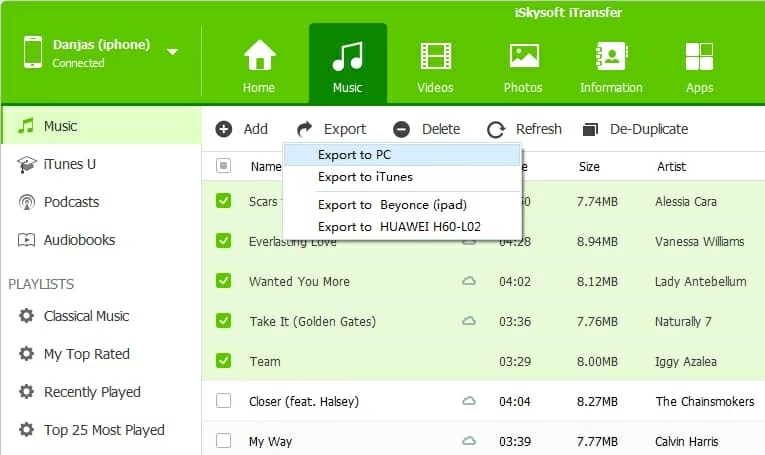
Next, move to the navigation bar and click Music. Then on the left-side, choose Music tab and you'll be presented with a list of songs stored on iPhone 7 device with details: Artist, Album, Times, Size, Date Added.
Scroll through the list to find the songs you need, and highlight the items by checking the tiny boxes. You can also place a checkmark in the box next to Name to put all music files onto Windows 7 from iPhone 7, if desired.

Step 3: Importing tracks from iPhone 7 to Windows 7 PC
Once you're satisfied with the selections, navigate to Export > Export to PC at the top menu bar.
Next up, a dialog window pops up, asking you to select a save path for the migrated music files.
With everything is set up, click on Save button and the utility will set about copying music from iPhone 7 (Plus) onto Windows 7's hard drive automatically.
Tips: The software is dedicated to enhancing user experience. It allows you quickly transfer a playlist from the iPhone 7 to Win 7 computer. Just place your cursor on the name of the playlist that you want to migrate, and right-click it to choose Export to PC.

That's all there is to it.
Apple's music subscription service—Apple Music/ iTunes Match
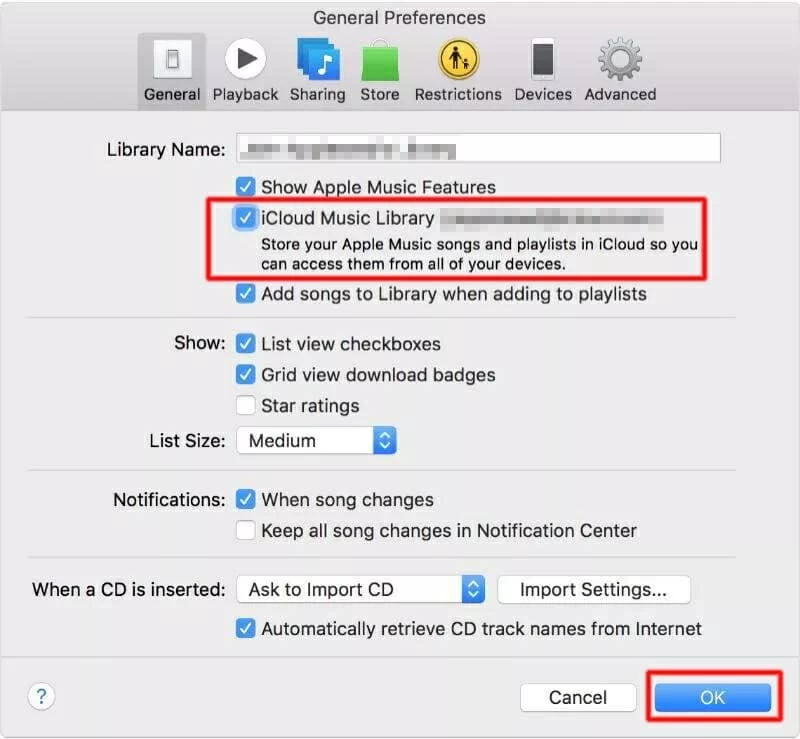
If you're a subscriber of Apple Music or iTunes Match, an ideal option is to embrace Apple's iCloud service. Using iCloud Music Library to transfer songs on iPhone 7 to the Windows 7 machine is rather simple: enable the feature on iPhone 7 and iTunes on Windows 7, and download the tunes to the computer. Don't Miss: Use iCloud Music Library on PC
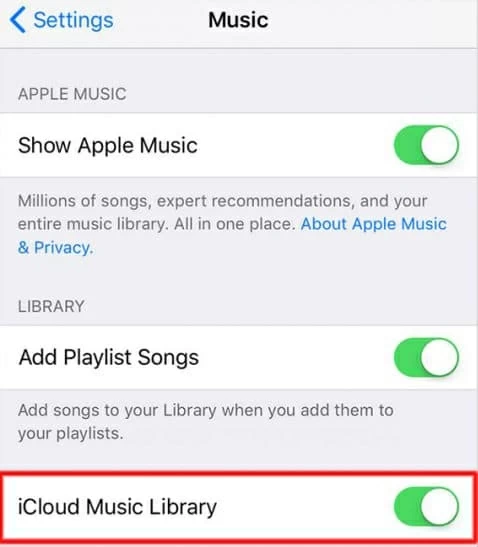
It is worth mentioning that iCloud Music Library might not be available in all countries or regions.


