How to Move Music from iPad to Huawei


Holding on iPhone SE over years, you might take it for granted that, to transfer music from iPhone SE to MacBook (Air, Pro), the root will be Music app (or iTunes in macOS Mojave or earlier). Apple's iTunes is particularly designed for transferring purchased music from Apple, however, it should come as no surprise that you'll have no luck when copying non-purchased music into MacBook. Instead, a 3-rd party tool weighs more to move over ripped CDs, old MP3s, music collections from Internet, etc. And here, this post will make it straightforward to you by exploring a solid program.
Before jumping into migrating non-purchased music from iPhone SE back to MacBook, we've listed quick instructions first to guide you through moving songs from iTunes library and paid Apple Music catalog into the MacBook.
Part 1: Transfer iTunes purchased music
Apple's free solution for importing tracks bought from iTunes store into MacBook is named "Transfer Purchases" within Music app. To sync iTunes purchased music, do the following:
Noted: Below wizard is based on Music app in macOS Catalina and above. If you're on a MacBook with macOS Mojave and earlier, hit here to get a detailed guide for "Transfer purchases" in iTunes.
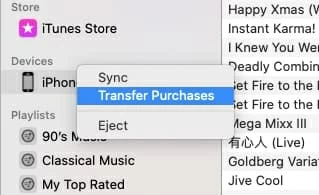
Once the music synchronization completed, click Recently Added in the sidebar and copy over iPhone SE songs to MacBook (Air, Pro).
Part 2: Transfer purchased music from Apple Music library
The Music also provides Apple Music subscribers with the music cloud service to get songs synced across devices logging with the same Apple account. To download songs from iPhone SE into MacBook's hard drive, make sure that the "Sync Library" is enabled:
The syncing process may take a while. Once done, go to Recently Added section in the left column and click the Download icon to save songs on iPhone SE onto MacBook (Air, Pro).
Part 3: Get non-purchased music off iPhone SE onto MacBook
Music app (or iTunes) stump you in putting non-purchased music collection into MacBook Pro or MacBook Air? Download iPhone Data Transfer. Problem solved.
Wrapping everything in one package, this program can scan contents of iOS devices (iPhone, iPad, iPod) and allow you either archive them or transfer them between devices or between a device and a PC or a Mac.
Without installing iTunes or Music app, it can easily bring track(s), albums, playlist(s) and other music files from your iPhone SE library into MacBook's any specified folder, the metadata of which comes together, too. When getting in reverse - putting songs on Mac back to iPhone, this smart tool can convert music files to iOS supported files before doing a transfer. Besides, just like music, other types of data on your device i.e. photos, videos, audiobooks, apps, etc. will be accessible through respective individual section for instant transfer.
[Further Reading: How to Back up iPod Music to MacBook (Pro, Air)]
All in all, iTransfer is well-thought-out. And here is a step-by-step tutorial on transferring iPhone SE songs into MacBook (Pro, Air), which is completely doable for even beginners.
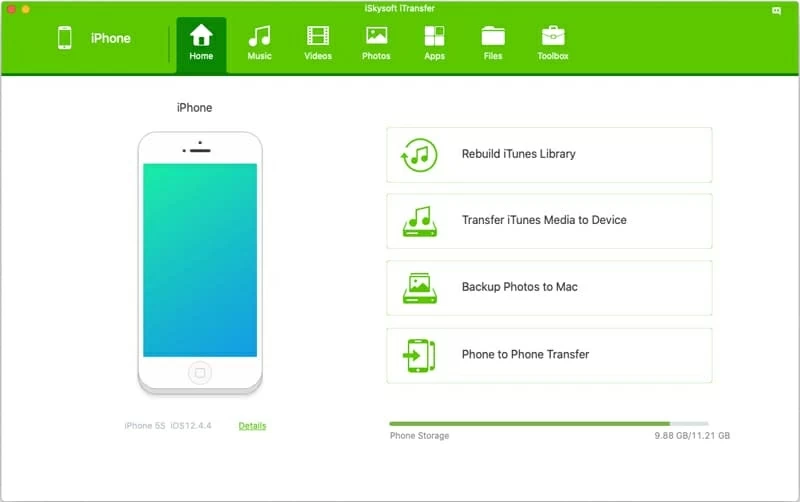
Step 1: Open the software and connect iPhone SE to MacBook
Starting on running the program on your MacBook (Air, Pro) with iPhone SE getting connected. Then, a device icon should show up immediately in the left of the screen.
Tips: Beside the icon locates four shortcuts for quick access of Rebuild iTunes Library, Transfer iTunes Media to Device, Backup Photos to Mac, and Phone to Phone Transfer.
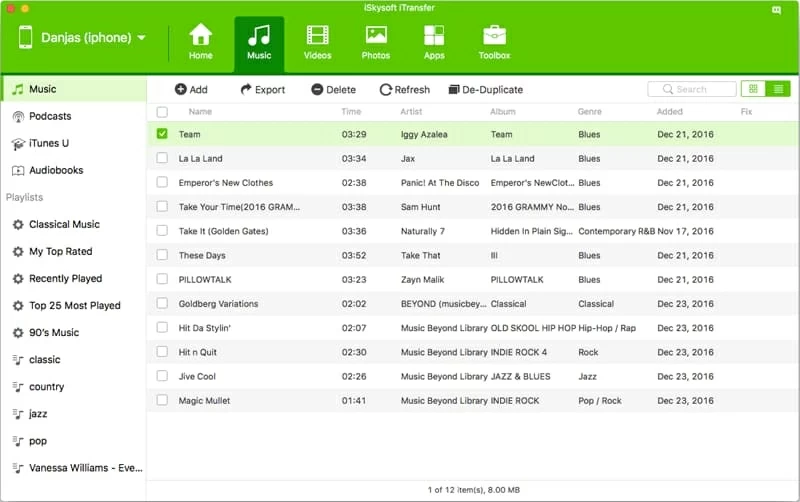
Step 2: Preview and select desired songs to transfer
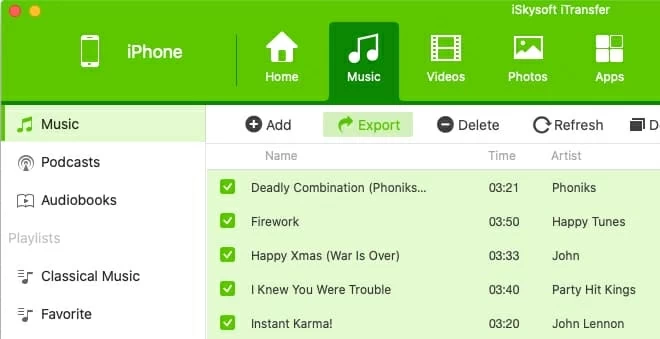
To pull songs off iPhone SE and copy onto MacBook, go over to Music section at the top bar.
Once you been there, find the songs you wish to transfer across to your MacBook music library and then highlight them by clicking the boxes next to each song's name, or click Command-A to select all at once.
Step 3: Choose output folder and move iPhone SE music library on MacBook
With wanted songs selected, click the Export button from the top row, and select a folder to tell the software where the transferred music files should be stored on the MacBook. Then, the transfer process commences to transfer iPhone SE music collections over to MacBook.
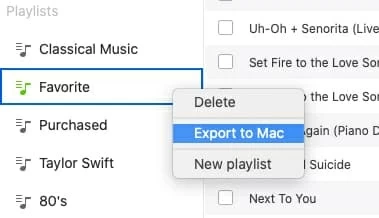
What to do if you want to migrate over entire playlist(s)?
In the sidebar of the "Playlists" column, right-click the name(s) of the playlist(s) and choose "Export to Mac" under the drop-down menu.
Done!