
Tree Ways to Sync Music to iPhone without iTunes


I finally got a new computer as my previous laptop crashed days ago. I have set up iTunes to sync my iPhone to my new machine. When I plugged my iPhone to computer, the iTunes syncing messages appears, saying that "Do you want to remove this iPhone and sync with this iTunes library". Of course, I won't let this happens, but what can I do as I cannot lose anything on my iPhone?
Not as simple as it is to use iPhone, many users may struggle to trigger a synchronization between iPhone and a new computer via iTunes, alike the above situation. Apple's iTunes is the native utility to manage iPhone and other iOS devices, like backing up iPhone data to locally or transferring apps and iTunes purchases, but unfortunately, it tends to be a huge culprit when it comes to syncing an iPhone to a new computer, since all the stuff on the device will be completely erased and replaced.
Speaking of switching iPhone to another machine, you may want to transfer anything, whether it's Apple-authorized media files or the non-purchased data from iTunes Store, across from iPhone to the folder or iTunes Library on new computer. However, the fact is that Apple's iTunes provides no options to copy iPhone non-purchases media files as well as other personal data onto a new computer, and thus you don's need to constantly wrestle with iTunes to get that done.
Instead, to keep your iPhone in sync with the new Windows and Mac based computer without losing data, just look no further than iPhone Data Transfer, which is one of our favorite iPhone syncing applications for its insanely powerful data managing ability.
iTransfer is a piece of pleasant iTunes alternative software that lets you do lot of things that iTunes won't. It's able to directly access the iPhone's file system, granting the ability to transfer various contents including messages, contacts, music, playlist, audiobooks, podcast and many more, both to the computer's hard drive or the iTunes-supported stuff into iTunes library with ease, overriding the rigid syncing process within iTunes. Another strong point of it is its built-in conversion functionality, and thus it can handle any file format your throw at it.
The interface is pretty nice, packing with organized tabs on the navigation bar, so that you can easily understand what the program exactly can do and point to the specific options as you want. The following guide will guide you to save your iPhone music onto a new Mac computer, but it's applied in syncing other contents on your iPhone to the new machine (PC & Mac), like videos, photos, podcasts, audiobooks, etc.
If you have contacts, messages , apps on your iPhone that you don't want to lose or re-download, and wish to securely back up the iPhone with the new computer, then you have to employ the Windows version of iTransfer and perform the syncing task on a Windows desktop or laptop.
Back up iPhone Music and Other Files to a New Computer
Step 1: Hook up your iPhone with computer
Download the program on your computer, install it and open it.
Grab an included USB cable to connect iPhone and computer. Wait for the program to recognize the device and load all the files.
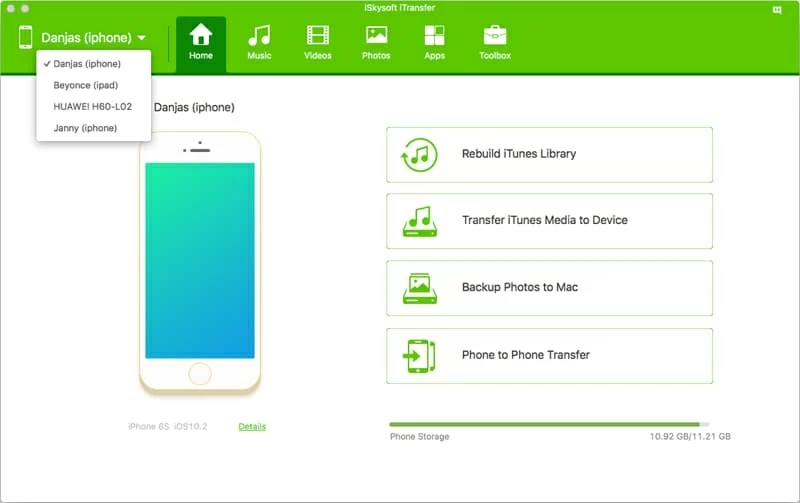
Then, you should see the iPhone appear on the window and the four shortcuts on its right side — one can choose Rebuild iTunes Library option to copy media files from iPhone to computer's iTunes library.
Step 2: Locate the songs on iPhone and choose the ones to copy over
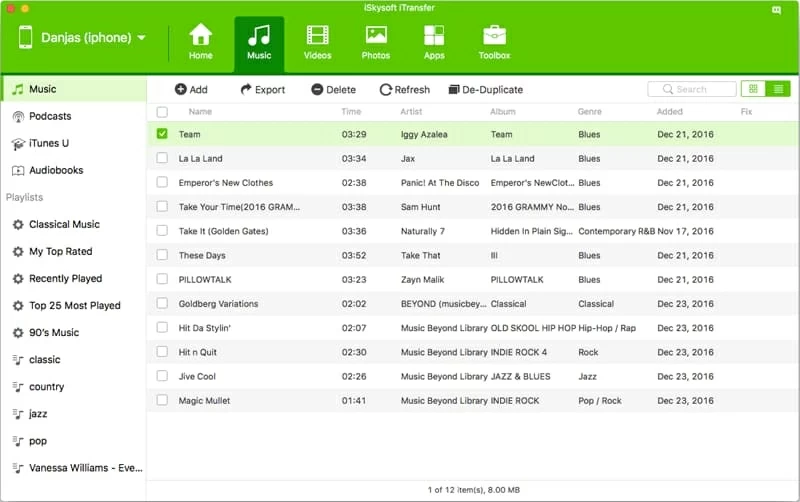
Head to the navigation bar, click Music tab and you will see all the tracks on your iPhone get displayed.
From there. choose Music category on the left sidebar to expand your music collection of your iPhone on the right pane, and you can use the scroll bar on the right to scroll through all your tracks if you have quite a lot songs.
Next, select as many songs as you like on the right pane by checking the items.
Step 3: Choose output location and fire up iPhone music sync to new machine
After your selections, do a right click on Export button underneath the navigation bar and choose Export to Mac (here will be Export to PC if you're on a PC) option from its pull-down list.
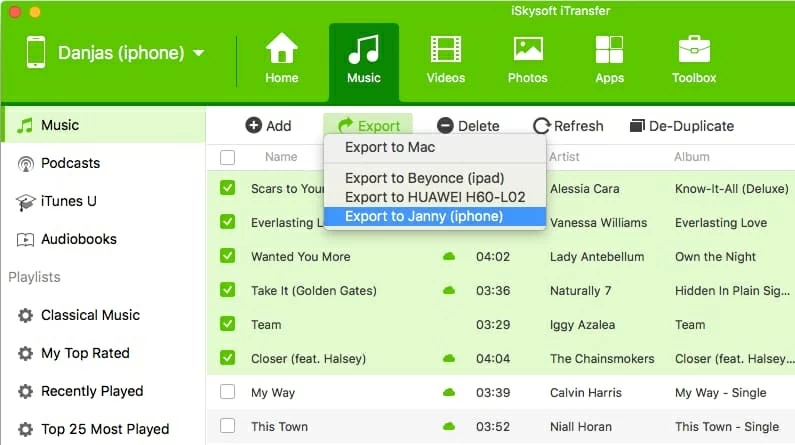
In the pop-up window, select a directory within your new Mac, under which you want the songs moved to, then click Save button
Your music is now being copied from the iPhone onto your new machine.
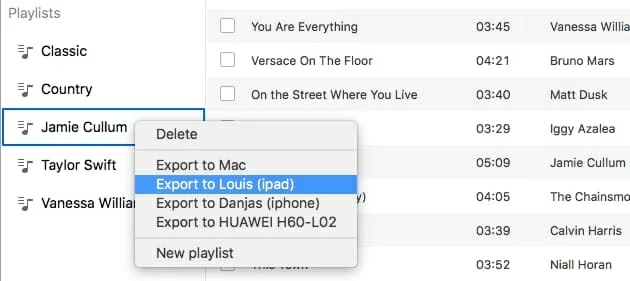
If you've created a playlist on iPhone, you can import it in full to local folder on your new computer. To do so, navigate to a playlist you wish to transfer, right it, choose Export to Mac, then select a folder of you choice.
Do the same as step 1-2-3 above for Videos, Photos on the navigation bar, and you are all set for syncing up almost everything from iPhone to a new computer (Mac & PC) without erasing data files. All are straightforward and intuitive.
Sync iPhone to iTunes Library on New Computer
If you want to save the contents such as music, playlist, videos and other media files to iTunes library on new computer from iPhone, so that you can sync your iPhone with this new machine whenever you suffer from data loss on iPhone, then iTransfer also give you the precise option that we've mentioned above — Rebuild iTunes Library in one click. To do this:
Transfer iTunes Purchases onto New Mac & PC from iPhone
Some of loyal iTunes customers may hold a numerous of songs or movies bought from iTunes Store, you will still need to rely on iTunes to get those purchased stuff synced with new your new computer, whether you use a PC or a Mac. Here what you should do:
Conclusion
With the help of robust iTransfer, it's virtually easy to transfer all data and keep iPhone synced to a new computer without losing information. All in all, iTransfer is a much versatile and flexible utility than iTunes that brings you greater control over managing iOS devices and backing up data from iPhone onto Windows or Mac powered computer.


